*** How To Setup ***
Setup #1 - wowaidERP.zip and dist.zip files
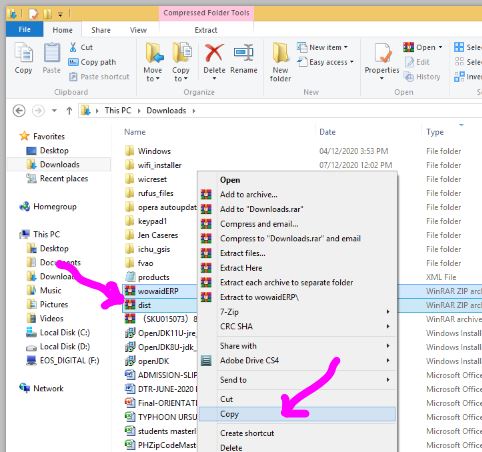
(Step 1) Copy wowaidERP.zip and dist.zip files
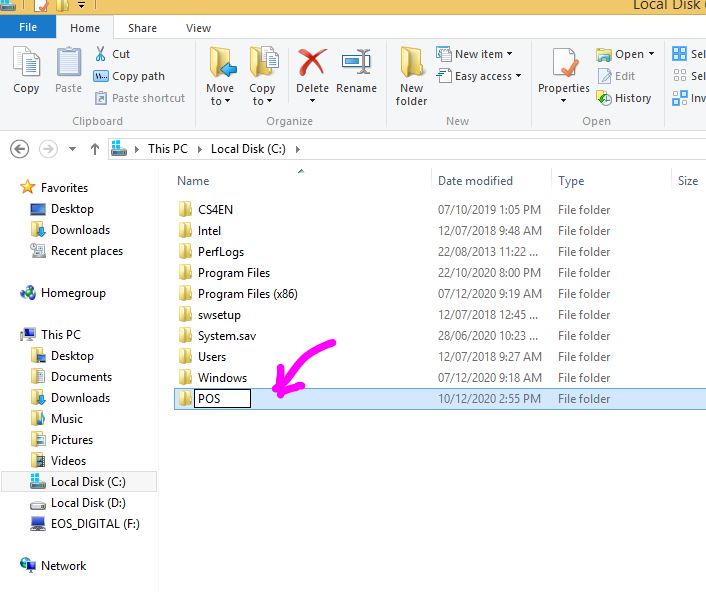
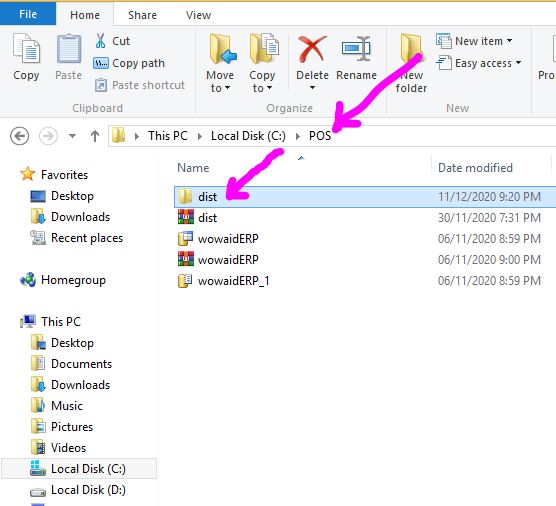
(Step 2) Right click in Drive C: and Create a folder named POS

(Step 3) Create a folder "POS"
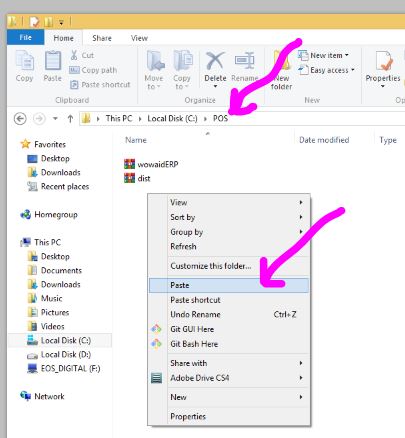
(Step 4) Open the folder POS and Save the files (wowaidERP.zip and dist.zip)
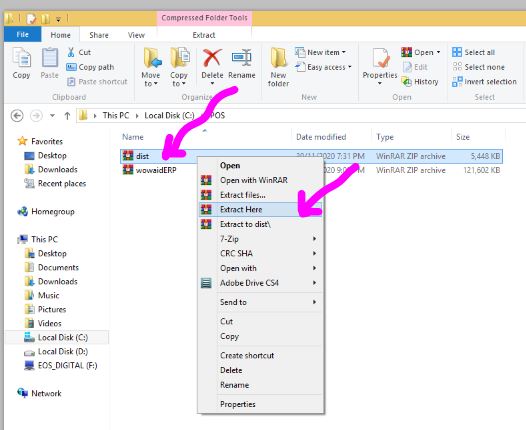
(Step 5) Right click the file (wowaidERP.zip and dist.zip) and Extract
Setup #2 - SQL Server Management Studio
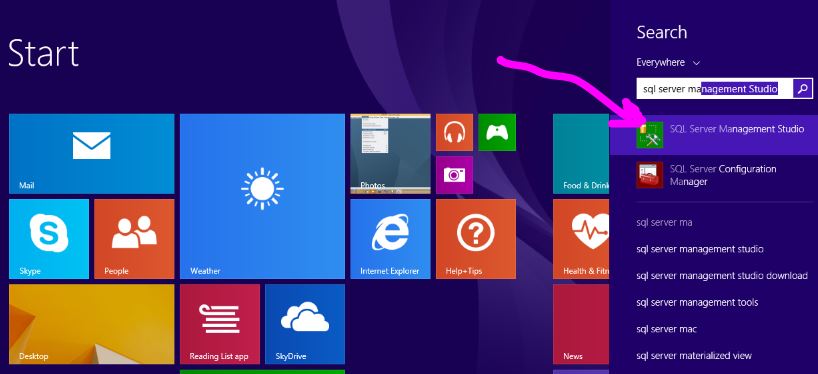
(Step 1) Search and Open the File SQL Server Management Studio
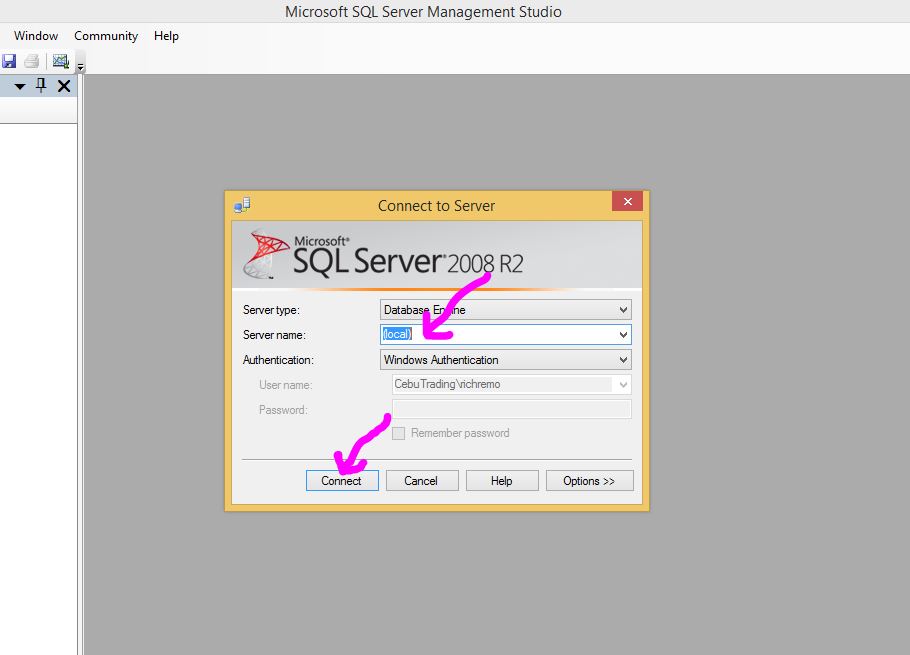
(Step 2) Type "(local)" in Server Name and click Connect
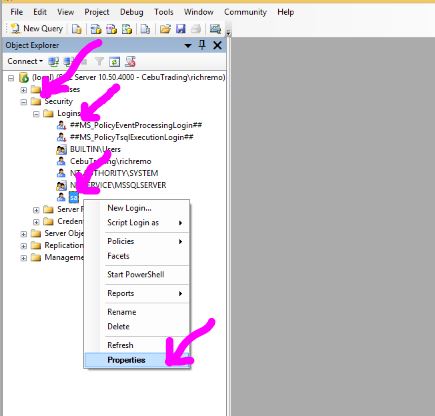
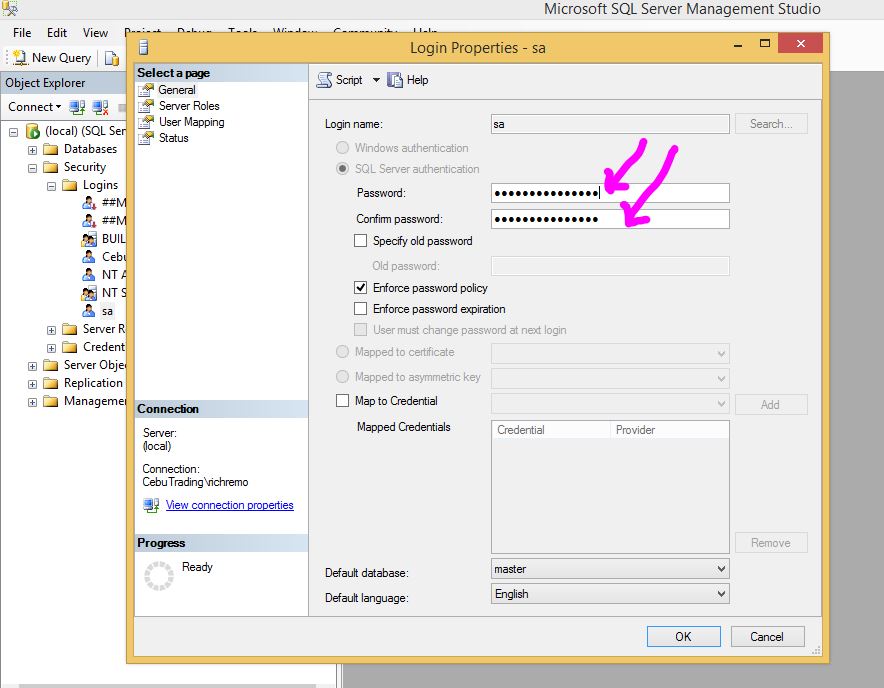
(Step 3) Go to Security -> Logins and right click "sa" and click Properties
(Step 4)Enter Password "1234567890"
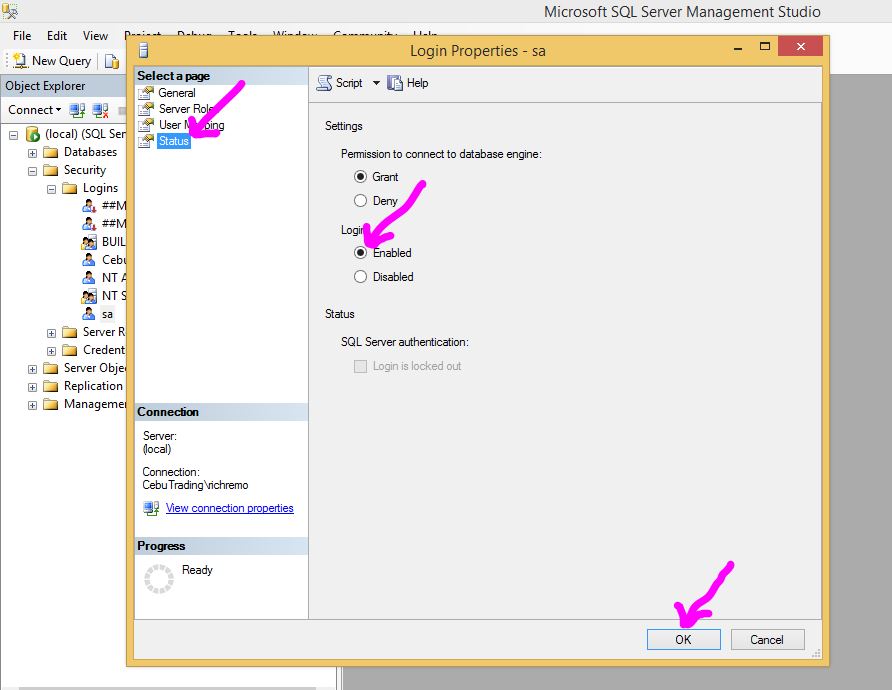
(Step 5) Go to "Status" and set Login "Enabled" and then click "OK"
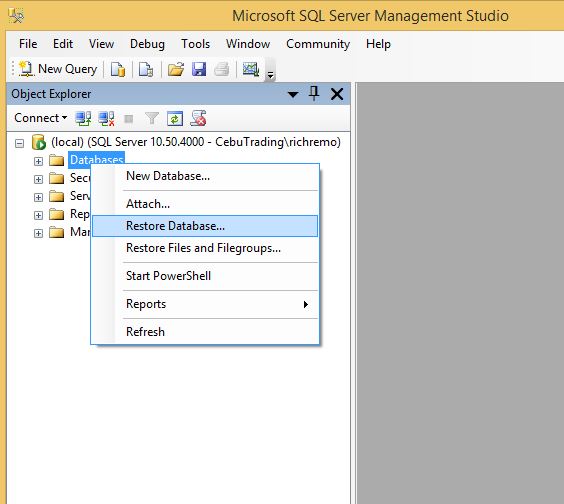
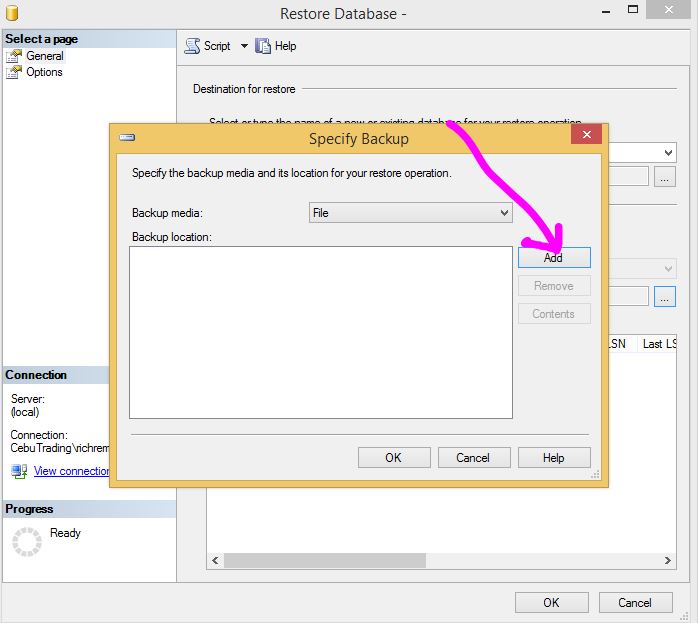
(Step 6) Right click on "Database" and click "Restore Database"
(Step 7) Select "From Device" and browse the file "wowaidERPbu.bak"
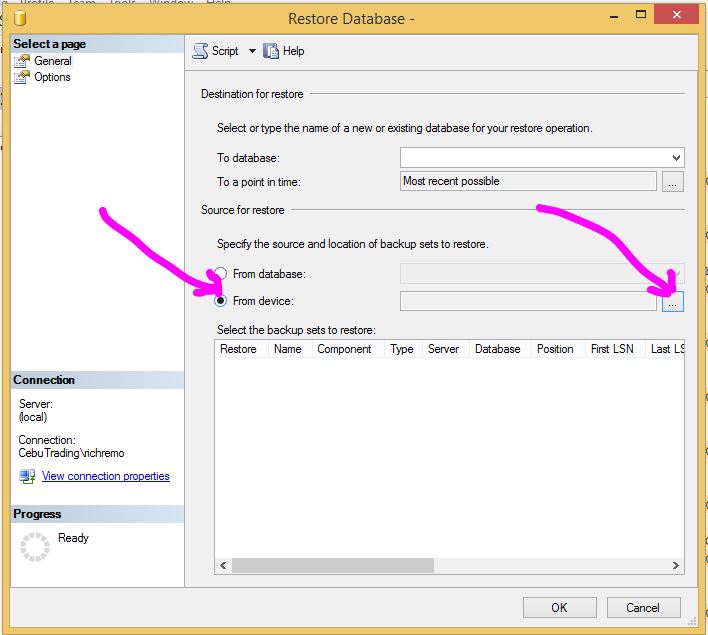
(Step 8) Click "Add"
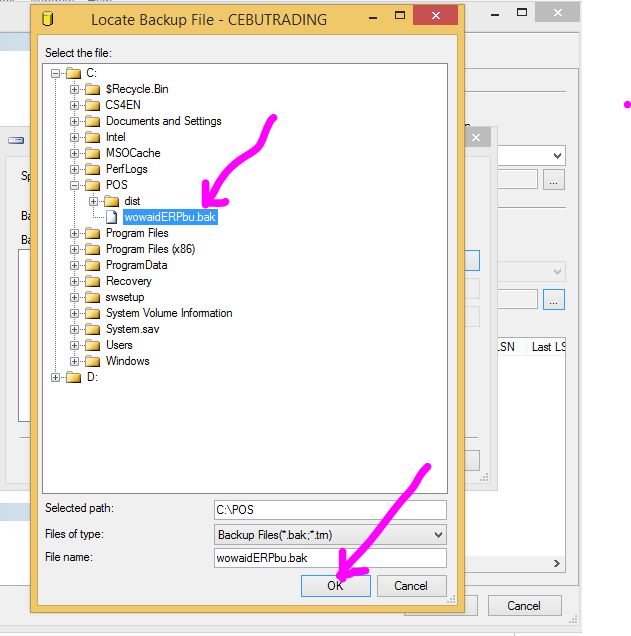
(Step 9-A)Select the file and Click OK
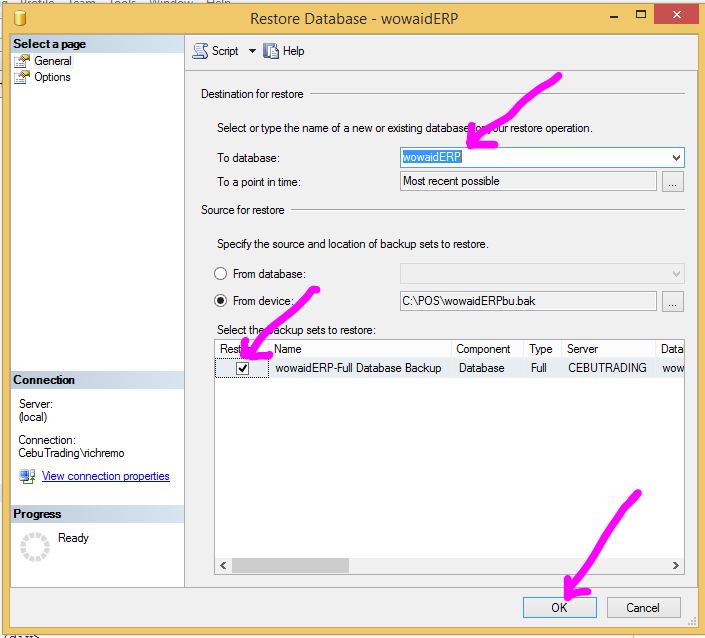
(Step 9-B)
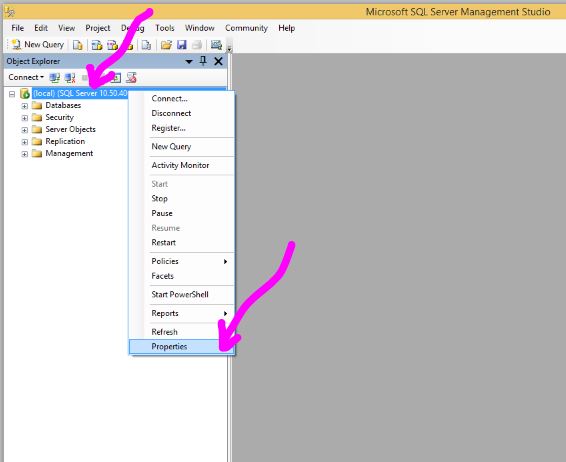
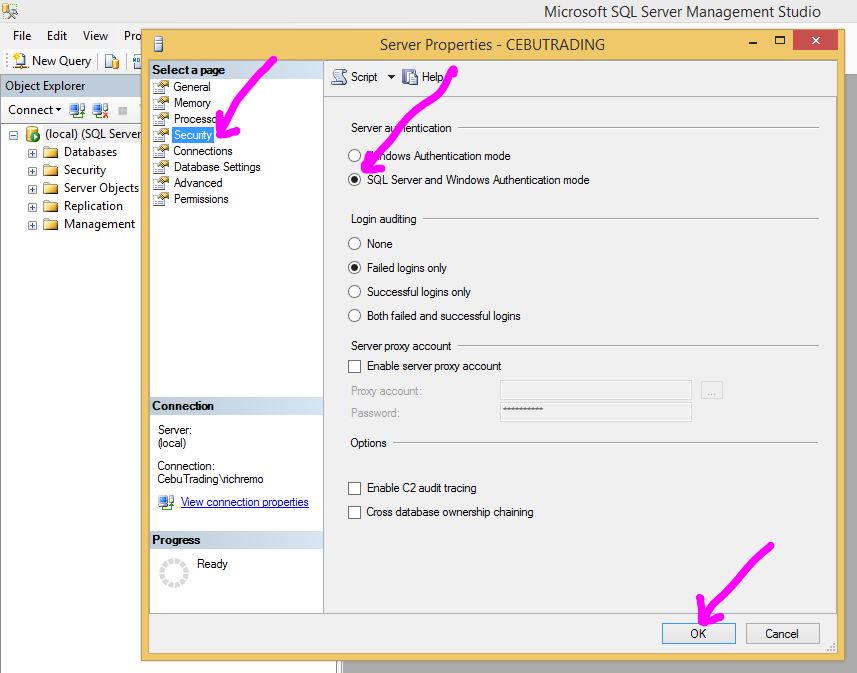
(Step 10) Click and Right click "(local) (SQL Server 10...) and open Properties"
(Step 11) Go to Security and select "SQL Server and Windows Authentication Mode" and press OK
Setup #3 - SQL Server Configuration and JRE (Java Runtime Environment)
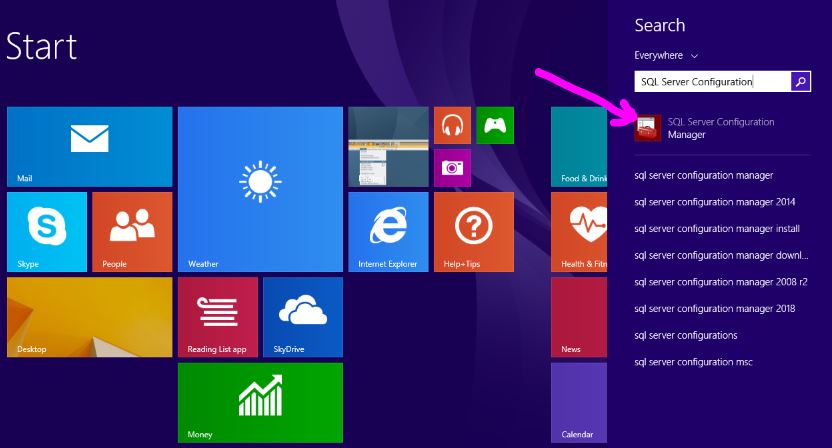
(Step 1) Search and Open the file "SQL Server Configuration Manager"
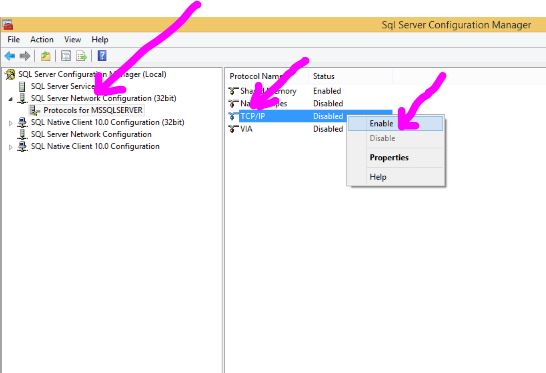
(Step 2) Go to "SQL Server Network Configuration" and select "Protocols for MSSQLSERVER and in the right pane, "Enable" the TCP/IP
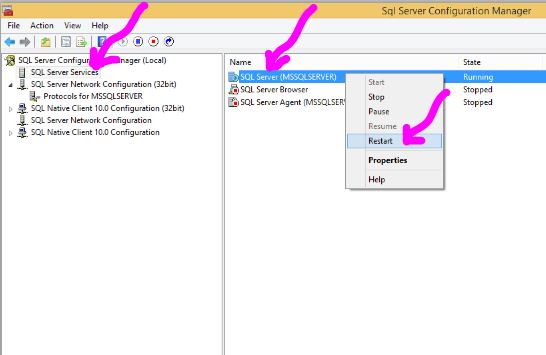
(Step 3) Go to "SQL Server Services" and in the right pane, right click "SQL Server (MSSQLSERVER)" and select "Restart"
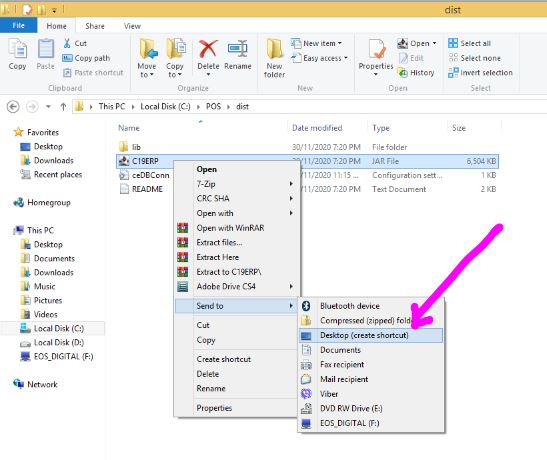
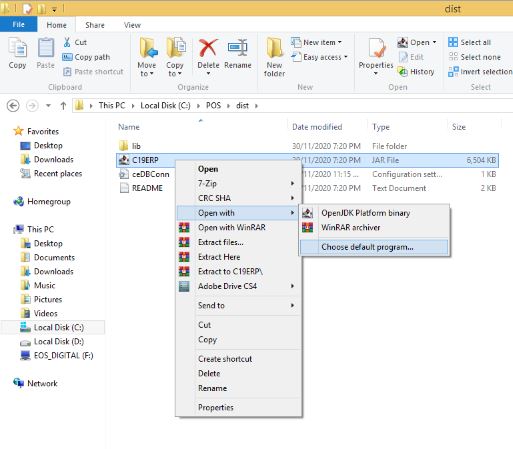
(Step 4) Go to folder c:/POS and open the folder "dist"
(Step 5) Right click the file "C19APP" and go to "Open with" and select "Chose default program"
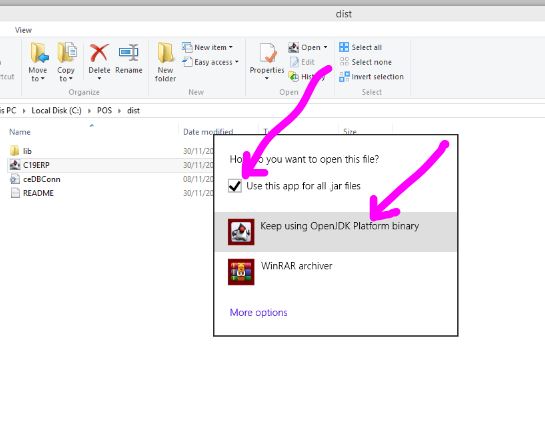
(Step 6) Select and check "Use this app for all" and click "OpenJDK Platform Binary"
(Step 7) Create a shortcut to "Desktop". Right click the file "C19APP" and go to "Send to" and select "Desktop (Create Shortcut)"